Best Ways to Transfer YouTube Playlist to Spotify
YouTube Music and Spotify are two popular streaming music platforms that offer a vast collection of songs and playlists. If you have a carefully curated YouTube playlist and want to enjoy it on Spotify, transferring YouTube music to Spotify can be a convenient way. While neither YouTube Music nor Spotify offers a direct method for transferring music between the two platforms, there are a few workarounds that you can use to transfer your playlist seamlessly.
Whether you're switching platforms or simply want to access your favorite tracks on both services, we've got you covered. In this article, we will explore the best ways to transfer YouTube playlists to Spotify seamlessly.
- Method 1. Easiest Way to Transfer YouTube Playlist to Spotify Using Macsome [Recommended]
- Method 2. Move YouTube Playlist to Spotify with PlaylistGo
- Method 3. Transfer YouTube Playlist to Spotify Using Tune My Music
- Method 4. Import YouTube Playlist to Spotify Using Soundiiz
- Method 5. Transfer YouTube Playlist to Spotify Using Youfy
- Considerations and Frequently Asked Questions
Method 1. Easiest Way to Transfer YouTube Playlist to Spotify Using Macsome
Spotify has a catalog of over 100 million tracks on its platform, it also gives its users the opportunity to upload their own music to their platform. One of the easiest ways to transfer your YouTube playlist to Spotify is by using a third-party converter software. Macsome YouTube Music Downloader is such a multi-functional tool for you. With it, you can manually select the songs from your YouTube Music library and convert them into a format, like MP3 or AACthat can be uploaded into Spotify. While this method can be time-consuming, it ensures that all metadata from the original YouTube Music playlists is preserved.
Macsome YouTube Music Downloader allows both YouTube Music Premium and Free users to efficiently download YouTube Music songs, albums, playlists, and music videos to your local folder so that you can transfer YouTube Music to Spotify, Apple Music, or other streaming music platforms, etc. What's more, it also supports converting YouTube Music to MP3, AAC, WAV, FLAC, AIFF, and ALAC with original output quality, so you can move YouTube Music to different types of audio devices and listen to your favorite songs wherever you go.

Main Functions of Macsome YouTube Music Downloader
- Convert YouTube Music to MP3 / AAC / WAV / FLAC / AIFF / ALAC.
- Download YouTube Music songs, albums, playlists, and music videos.
- Support to download YouTube Music with a Free account.
- Support batch conversion and up to 10x faster conversion speed.
- Keep high output quality and ID3 tag information after conversion.
- Transfer YouTube Music to Spotify, Apple Music, Android, iOS, etc.
Steps to Transfer YouTube Music Playlists to Spotify with Macsome
In this guide, we'll go through the process of uploading YouTube Music to your Spotify account by using Macsome YouTube Music Downloader.
Step 1. Import YouTube Music Playlists to Macsome
First, download, install, and launch the latest version of Macsome YouTube Music Downloader on your computer, and YouTube Music web player start simultaneously. and then sign in to your YouTube Music account to access your YouTube Music library.

Search playlists, albums, or artists by navigating to the YouTube Music Player Search user interface, open the playlist you'd like to upload to Spotify and click the "Click to add" button to load all the songs in this playlist to the conversion pane. Tick off the tracks you'd like to transfer to Apple Music.

Step 2. Set the Output Format
Click on the "Settings" in the bottom lefthand side of the Macsome, you can set the output audio format. There are six audio formats, including MP3, AAC, WAV, FLAC, AIFF, and ALAC for you to choose from. Spotify supports a variety of audio file formats, including MP3, WAV, and FLAC. For best audio quality, it's recommended to set FLAC or WAV as the output format on the drop-down list. Besides, you can also change other audio parameters to customize the output quality, such as bit rate and sample rate.

Step 3. Start to Download YouTube Music Playlist
After all the settings are in place, simply click on the "Convert" button to start the YouTube Music playlist downloading process.
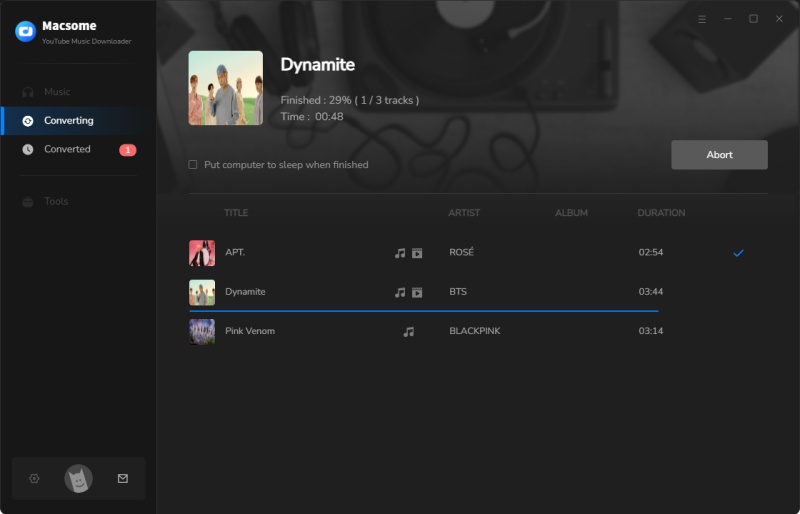
After downloading is complete, go to the "History" option, you can locate the downloaded YouTube Music songs in the history list.

Step 4. Upload YouTube Music to Spotify
Now that your favorite YouTube Music playlist was downloaded and saved in your local folder, then you can transfer YouTube Music playlist to Spotify.
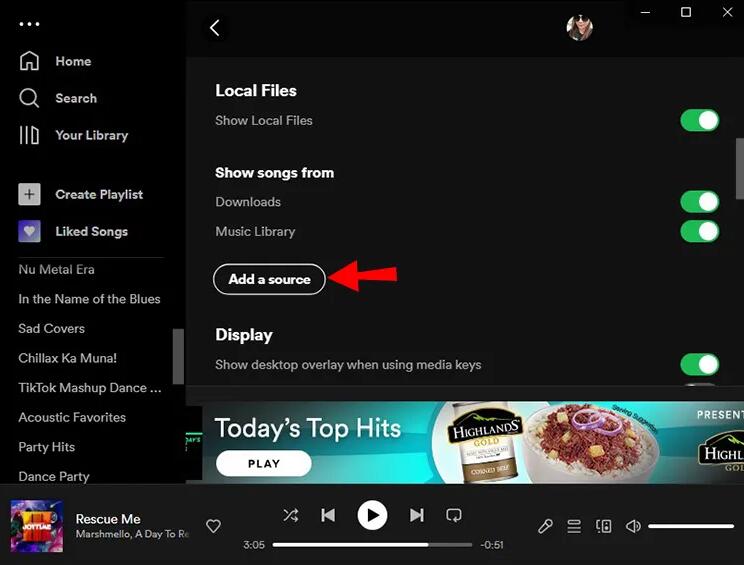
Open the Spotify desktop app on your Windows PC or Mac and sign into your account. Click the drop down menu button next to your account name and choose Settings. Scroll down the Settings screen to the Local Files section, and toggle the Show Local Files switch.
Select Show songs from Downloads or Music Library (or both). Select Add a source and upload the local folder where your YouTube Music playlist is stored. Now you can listen to the uploaded YouTube Music songs with the Spotify desktop app. All the songs stored in the chosen local folder will appear in the Local Files folder on Spotify.
Method 2. Move YouTube Playlist to Spotify with PlaylistGo
PlaylistGo is a popular third-party service that supports transferring playlists between YouTube Music and Spotify (among many other platforms). It matches tracks based on metadata, though some songs may not transfer perfectly if they're unavailable on Spotify or have matching issues.
How to Use PlaylistGo to Transfer Playlist from YouTube Music to Spotify
Step 1. Download, install, and open PlaylistGo on your computer.

Step 2. Select YouTube Music as your source platform, and log into your YouTube Music account, and PlaylistGo will display your library so you can select what to transfer. You can also transfer playlists using a URL. Simply copy and paste the playlist URL into the text box and click Parse to load it.
Step 3. Select Spotify as the destination platform.
Step 4. Select the songs, albums, or playlists from YouTube Music that you want to transfer. Click the "Start Transfer" button. PlaylistGo will search for matching songs on the YouTube Music and display the results for confirmation.
Step 5. Click the "Transfer Settings" button on the right to start matching songs. Click "Next" to begin. PlaylistGo will transfer the selected music from the source platform to the specified location on the target platform.
Method 3. Transfer YouTube Playlist to Spotify Using Tune My Music
Another method to transfer YouTube Music to Spotify involves using an online tool, which allows you to import your YouTube playlists or individual songs into Spotify. One such tool is Tune My Music, a web-based app that supports transferring playlists, tracks, and albums between various music streaming services, including YouTube Music, Spotify, Apple Music, Deezer, Tidal, Amazon Music and more.
By following a few simple steps, you can easily transfer your YouTube playlists to Spotify using Tune My Music.
Step 1. Open your web browser and visit the Tune My Music website. On its main interface, you will see the "Let's start" button. Click it.
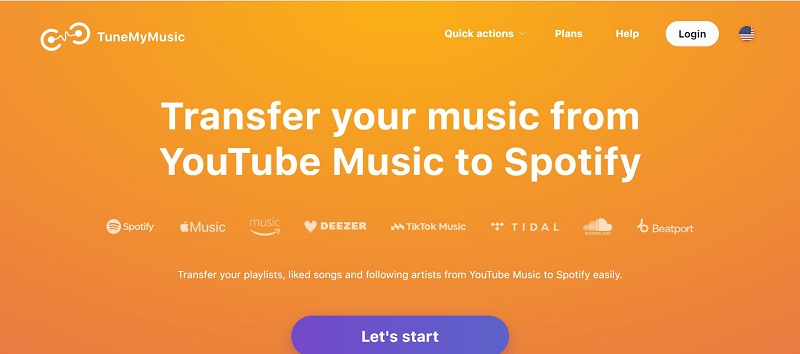
Step 2. Select the YouTube Music as the source, you can copy YouTube playlist URL and paste here directly, or log into your YouTube Music account. Then select the YouTube Music playlists you want to transfer.
Step 3. Select the Spotify as the Destination platform, and sign into your Spotify account.
Once completed, your YouTube Music playlists and songs will be automatically transferred to your Spotify account. Tune My Music offers a free plan that allows you to transfer up to 500 tracks between all music services.
Method 4. Import YouTube Playlist to Spotify Using Soundiiz
Soundiiz is another online tool that lets you convert your playlists and favorites between different music streaming services. You can use it to import your playlists and favourite tracks, artists, and albums easily from YouTube Music to Spotify, Apple Music, Tidal, Deezer, Amazon Music, and many more. Then, it will keep playlists automatically synced between different streaming platforms.
To import your playlists from YouTube Music to Spotify using this Soundiiz, follow these steps:
Step 1. Open the Soundiiz Web App and log in to your account. You can also sign in with your YouTube Music account.
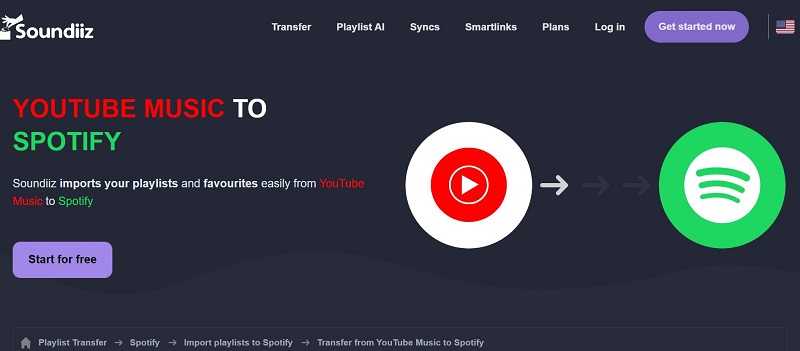
Step 2. From the list of streaming music sites, go to the left panel and choose the Platform to Platform option. Select the YouTube Music option as the source service and sign in to your YouTube Music account.
Step 3. Choose the playlists or tracks you want to transfer by checking the corresponding box on the left.
Step 4. Select Spotify as the destination service and connect your Spotify account. The transfer process runs in the background.
Once finished, your YouTube playlists will be available on Spotify. Soundiiz has some limitations on how much you can move over for free. It only allows you to move over one playlist at a time, and each playlist can only hold a maximum of 200 tracks.
Method 5. Transfer YouTube Playlist to Spotify Using Youfy
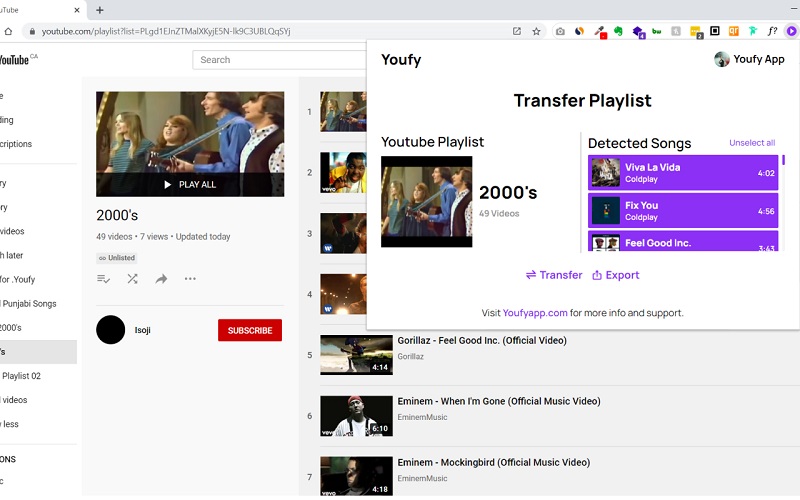
In addition to the aforementioned approach, it is also efficacious to employ a browser extension for the purpose of importing YouTube playlists to Spotify. Youfy is a free Chrome extension specifically designed to transfer songs and playlists to your Spotify account without leaving YouTube!
This tool can also be used to open YouTube songs on Apple Music and Amazon Music. You can even export YouTube playlists as .txt files. Currently, Youfy extension allows up to 50 songs per playlist to be transferred at once. This number might increase in the near future. Youfy is easy to use. Try it out and see how easy it is to move your YouTube playlist music to Spotify.
Step 1. Launch your Google Chrome browser and go to Youfy's official page. Click the "Add to Chrome" button on the right side of the screen.
Step 2. Once it's installed, head over to YouTube and find your preferred song or playlist. When you're on the page, locate the Youfy icon in your extensions list and click on it.
Step 3. Tap "Sign in to Spotify" and enter your sign-in details. Select the playlist you want to transfer in the Youfy extension and tap "Transfer". Wait for a few minutes for the transfer process to complete.
Considerations and Frequently Asked Questions
- Will my playlist on Spotify be exactly the same as the original YouTube playlist after the transfer?
- When transferring a playlist from YouTube to Spotify, there might be some differences due to the availability of specific tracks or albums on each platform. While many songs will likely be transferred successfully, some tracks might not be available on Spotify or might be available in different versions. It's important to review the transferred playlist on Spotify to ensure that all the desired songs are included and that any discrepancies are addressed. In this way, Macsome YouTube Music Downloader is much safer to prevent playlist loss.
- How do I convert a YouTube playlist to MP3?
- There is no direct way to convert a YouTube playlist to MP3. You can use third-party YouTube to MP3 Converters like Macome YouTube Music Downloader to download YouTube playlists to MP3 without quality loss.
- How do I Import a Spotify Playlist to YouTube Music?
- Like transferring YouTube playlists to Spotify, you can also use the Tune My Music, Soundiiz, and other online tools to import the Spotify playlist to YouTube Music. Besides, Macsome Spotify Downloader can download Spotify playlists to MP3 or AAC, so you can upload them to YouTube Music.
Conclusion
Transferring your YouTube playlist to Spotify can be done easily using various methods. Whether you choose a third-party tool, online applications, or a browser extension, you'll be able to seamlessly move your YouTube playlists to Spotify. Considering the convenience and metadata preservation, Macsome YouTube Music Downloader enables you to download YouTube playlists to Spotify supported audio formats so that you can manually upload the playlists from YouTube Music to Spotify without tracks limitation and loss.
Note: Macsome YouTube Music Downloader has a free trial version, which enables you to convert the first minute of each song. If you want to unlock the time limitation and get the full version, you can choose to purchase a license.


 Belinda Raman