Ultimate Guide to Burn YouTube Music to CDs
How to burn YouTube Music to CD on Windows? How to burn a CD from YouTube to Windows Media Player?
CDs work great for archiving music. A lot of YouTube Music users want to burn CDs from YouTube Music to play them in their car or CD Players. When they started but got no clue how to do it on YouTube Music.
YouTube Music is a music streaming service. With a Premium account, you can download your favorite tracks for offline listening. However, it is noteworthy that the downloaded YouTube Music is protected streaming content that can only be played within the YouTube Music interface. So far, there is no direct way to export any music content out of the YouTube Music app, to say nothing of burning music from YouTube to a CD.
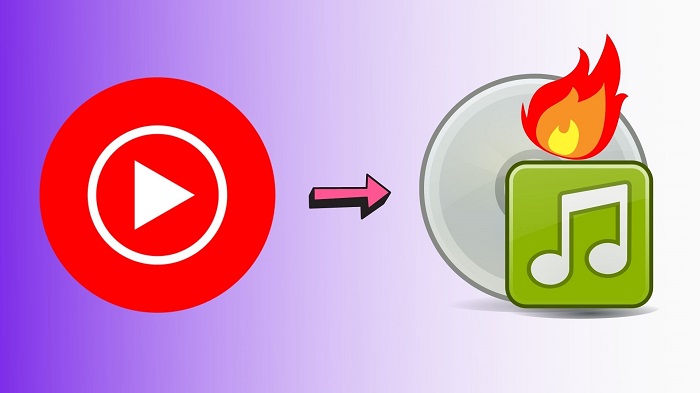
So, is it possible to burn YouTube Music songs to a CD? In this article, we will introduce a third-party tool to download YouTube Music effortlessly, so that you can burn music from YouTube to a CD without limits.
Part 1. Best Tool to Download YouTube Music Songs and Playlists to CDs
The best audio file formats for a CD are WAV, AIFF, and MP3. Among them, MP3 is a wide-used format compatible with most platforms, programs, and music apps. Therefore, if you can choose to download YouTube Music to MP3, then you are able to burn the downloaded YouTube Music songs to CDs.
Macsome YouTube Music Downloader is highly recommended for you. It is an all-around YouTube Music Converter. With it, you can not only download YouTube Music songs, playlists, and albums, but also convert YouTube Music to MP3, WAV, or other common audio formats that are supported by most CD-burning software. Thus, you have the ability to burn YouTube songs to a CD.
Why Macsome YouTube Music Downloader is recommended?
- Convert YouTube Music to MP3 / AAC / WAV / FLAC / AIFF / ALAC.
- Download YouTube Music songs, albums, and playlists.
- Support to download YouTube Music without a Premium account.
- Support batch conversion and up to 10x faster conversion speed.
- Keep high output quality and ID3 tags information after conversion.
- Support to copy YouTube Music to CDs, USB, an SD card, etc.
Part 2. How to Download YouTube Music to MP3 for Burning to CDs
With the assistance of Macsome YouTube Music Downloader, you can burn YouTube Music songs and playlists to CDs freely. Foremost, you need to download and install the program on your PC or Mac. Next, refer to the following tutorial to learn how to burn music from YouTube to a CD.
Step 1. Access the YouTube Music Library
Open Macsome YouTube Music Downloader on your computer, you will see the YouTube Music web player starting simultaneously, sign in to your YouTube Music account to access the YouTube Music library.

Step 2. Set the Output Formats for CD
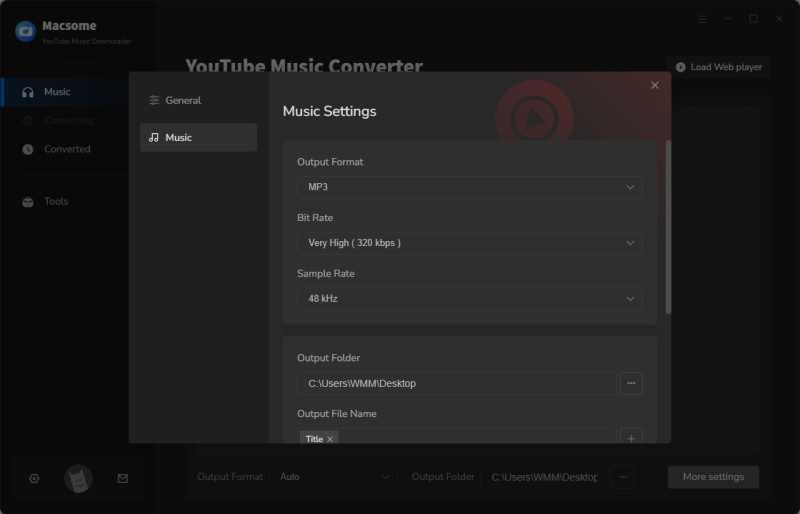
Then you could choose to set the output audio parameter by clicking on the "Settngs" in the left-hand corner of the main interface. From the "Settings" pop-up window, you can set MP3 as the output format for burning CDs. Besides, you are allowed to adjust other audio parameters (bit rate, sample rate), and customize the output folder to save the downloaded files.
Step 3. Add YouTube Music to Macsome
Navigate to YouTube Music and select a playlist you want to burn to a CD. Then you will see the "Click to add" button.
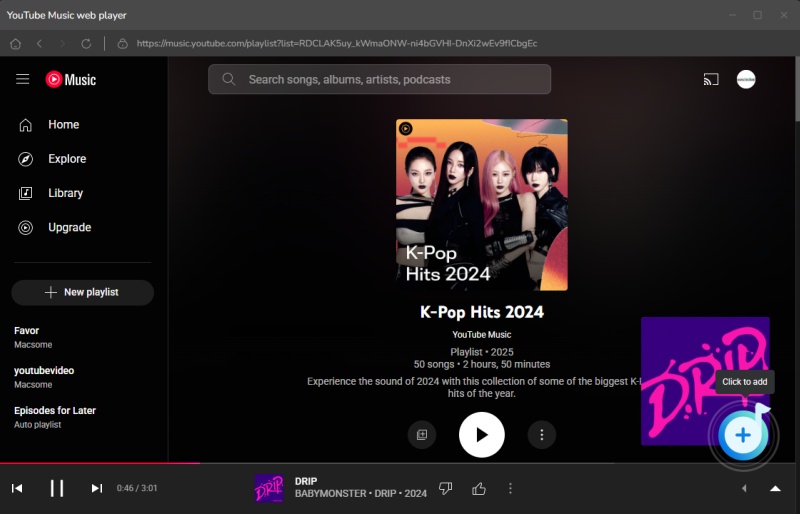
Click it and all the songs in the playlist will be loaded. Check the tracks you'd like to download.

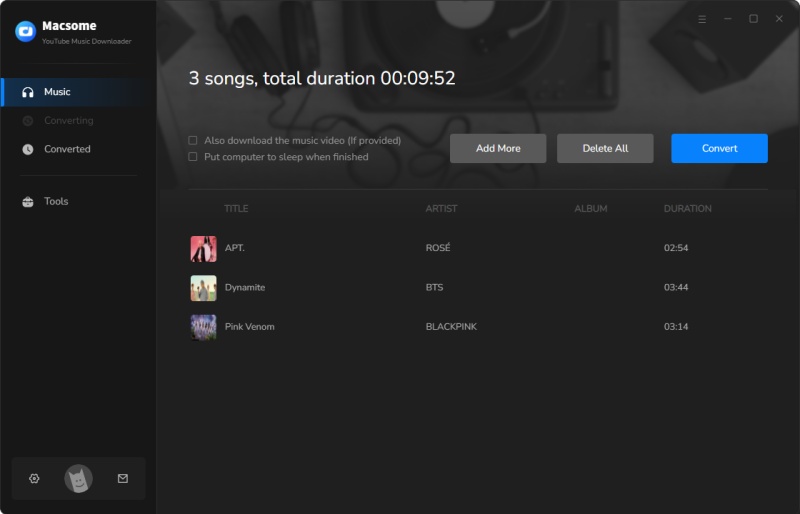
Click the "Add" button, all the songs will be loaded to the main window. You could import more songs from YouTube Music by clicking the "Add" button
Step 4. Start to Download YouTube Music to MP3
When you're ready, all you have to do is to hit the "Convert" button to start the YouTube Music to MP3 downloading process.
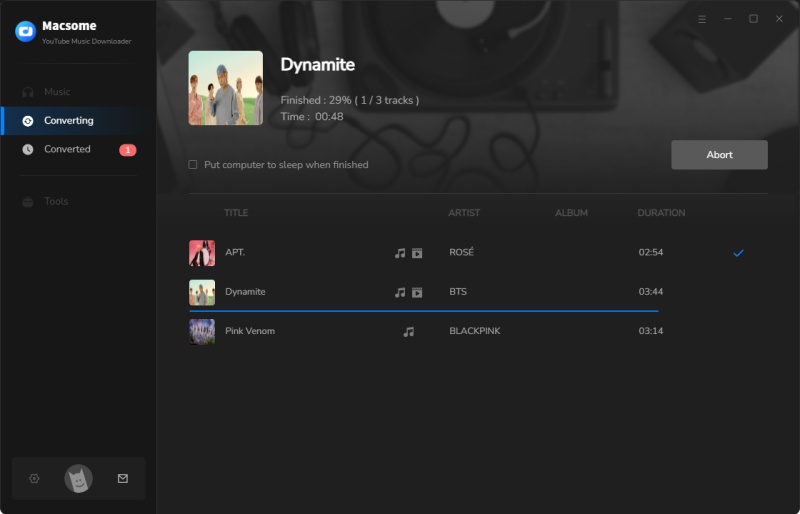
Just wait for a moment. When the downloading is completed, you can browse the downloaded YouTube Music songs in the "History" panel.

Part 3. Four Ways to Burn Songs from YouTube Music to CD
Now that you've downloaded YouTube Music files on your computer locally. What you need to do is to burn songs or playlists from YouTube Music to CDs. There are several ways to help you out. Just follow the tips below.
3.1 Burn YouTube Music Songs to a CD Using iTunes
If you have installed iTunes on your computer, you can use iTunes to burn the downloaded YouTube Music songs to the CD with the following steps:
Step 1. Create a Playlist for YouTube Music Songs
To burn a CD in iTunes, you should create a playlist to save the downloaded YouTube Music files. Open iTunes on your computer, click the "New" from the "File" menu and click "Playlist" to create a new playlist.
Then go to the "File" menu, select "Add File To Library" or "Add Folder To Library" to locate the downloaded YouTube Music files, and then click "Open".
Step 2. Start to Burn a CD from YouTube Music
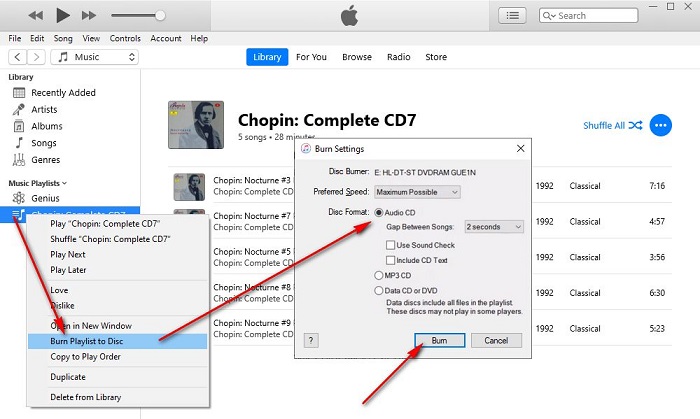
You can click "View" - "Sort By" to sort the songs. After that, insert a blank CD into the disc drive of your computer, right-click on the playlist, and select the "Burn Playlist to Disc "option.
From the Burn Settings window, tick "Audio CD" and customize Preferred Speed, Gap Between Songs, Use Sound Check, and Include CD Text as you need. Finally, click the "Burn" button to start burning from YouTube Music onto a CD with iTunes. Eject the CD when the burning process is complete.
3.2 Copy YouTube Music to A CD with Windows Media Player
You can also use the Windows Media Player to burn the downloaded YouTube Music songs to a CD.
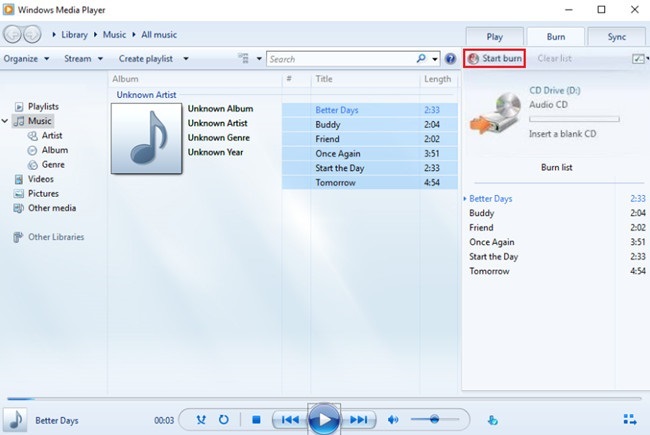
Step 1. Open the Windows Media Player, and create a burn list. Browse the downloaded songs from Amazon Music that you want to burn to the CD, and then import the songs to the burn list.
Step 2. Insert a CD into the optical drive of your computer. From the pop-up AutoPlay window, choose the "Burn an audio CD using Windows Media Player".
Step 3. Switch to the media list and click "Burn" on the tab. Hit the "Burn options" and choose Audio CD.
Step 4. Drag items from your Windows Media Player Library to the right side of the window. Press the "Start Burn" button to activate the permanent copy of your Amazon songs onto the CD.
3.3 Burn CD from YouTube Music Songs with VLC Media Player
The third approach allows you to burn a CD using VLC Media Player. Before starting, please make sure you have downloaded the latest version of VLC Media Player on your computer.
Step 1. Create a new playlist
First, you should create a playlist of the downloaded YouTube files you want to burn. It is simple, just drag and drop the songs onto the Playlist dock.
Step 2. Configure the settings before burning
Click "Media" on the toolbar and choose "Convert/Save" from the drop-down menu. Insert the CD you want to rip to your computer's disk drive. On the pop-up Open Media window, select the "Disc" tab, under which you will check "Audio CD" under "Disc Selection". For "Starting Position" by entering a number or hit the up arrow icon to set the track where you'd like to start. Click the "Convert/Save" button to continue.
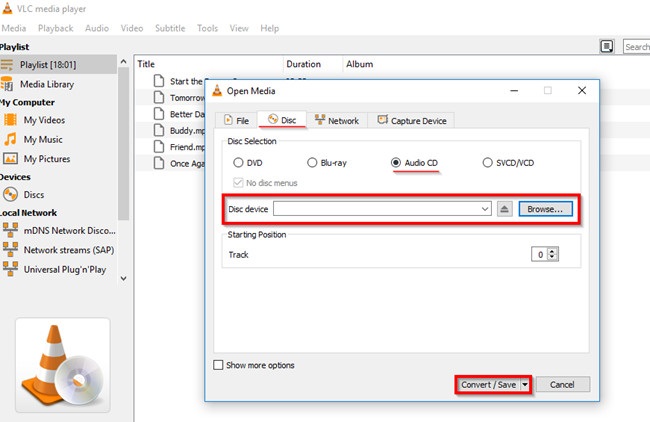
What goes next is the "Convert" window, select the "Tool" icon in "Settings", and then click the "Audio codec" tab, select the desired format, bit-rate, channels, and sample rate you need. Click "Save" to apply the settings.
Step 3. Start the burning
Then you will go back to the "Convert" window, and specify the destination folder by clicking on the "Browse" button. Now click "Start" to begin the conversion process. Wait for a while, you can find your Audio CD has been burnt perfectly.
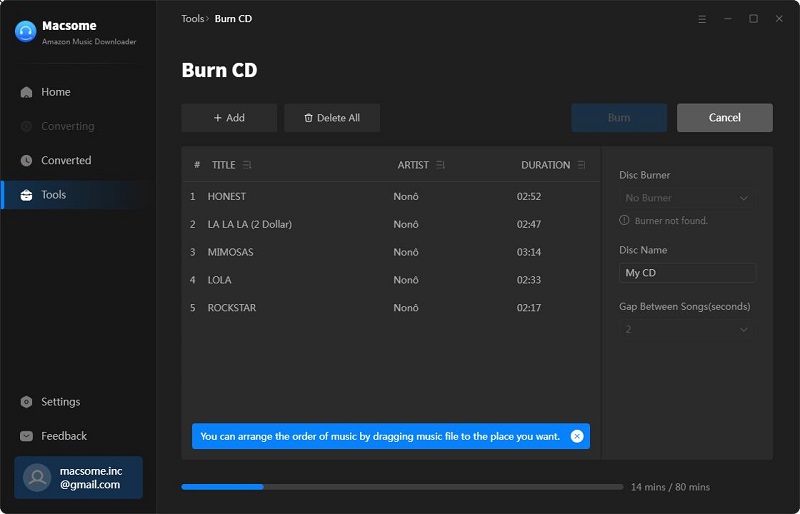
3.4 Burn YouTube Music to CDs using Macsome CD Burning Software
The last method is that you can use the built-in CD burning software of Macsome Amazon Music Downloader (Windows version only).
1. Launch the program on your PC, click on the "Tools" pane, then click the "Burn CD" option.
2. Click the "Add" button to import the downloaded YouTube Music files.
3. Press the "Burn" button to start burning the disc.
Conclusion
YouTube Music uses encryption technology to protect its streaming content. Therefore, you can't burn music from YouTube to CDs directly. Don't worry, Macsome YouTube Music Downloader can help you out. With it, you can download any content from YouTube Music to plain audio formats supported by almost CD burners. Then you can easily burn YouTube Music to CDs. What are you waiting for? Make your dedicated music CD right now!


 Belinda Raman