Part 1: How to Register Macsome Tidal Music Downloader for Windows?
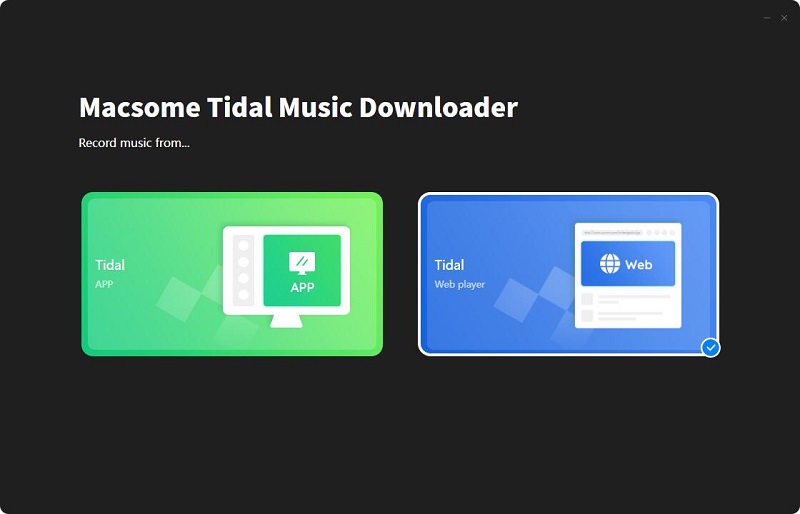
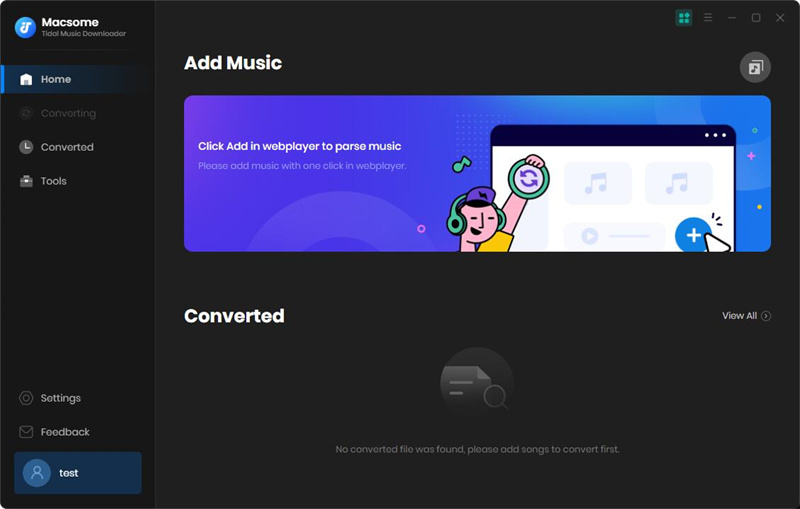
At first, download, install and launch Macsome Tidal Music Downloader on your computer. If you use the program for the first time, you could see the clear interface. Macsome Tidal Music Downloader provides two download modes, which let you download music from the Tidal app or through the Tidal web player. Choose either download mode.
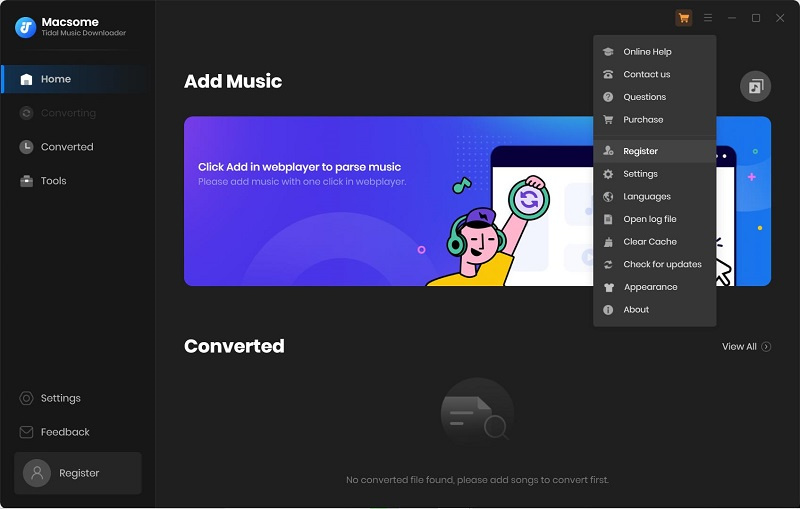
Step 1: You can directly click the profile icon on the left to open the registration window and complete the registration process. Besides, you can also click the icon on the top-right user interface, and choose "Register" option in the drop-down list.
Step 2: Copy and paste the registration Email and Code into the registration popup dialog, then click "Log In".
Part 2: How to Use Macsome Tidal Downloader Windows?
Macsome Tidal Music Downloader provides two download modes, which let you download music from the Tidal app or through the Tidal web player. You can choose either of them as you need.
Tidal App: Download music at 5X speed; keep HiFi/Master quality.
Tidal Web Player: Download Tidal HiFi music at 10X speed.
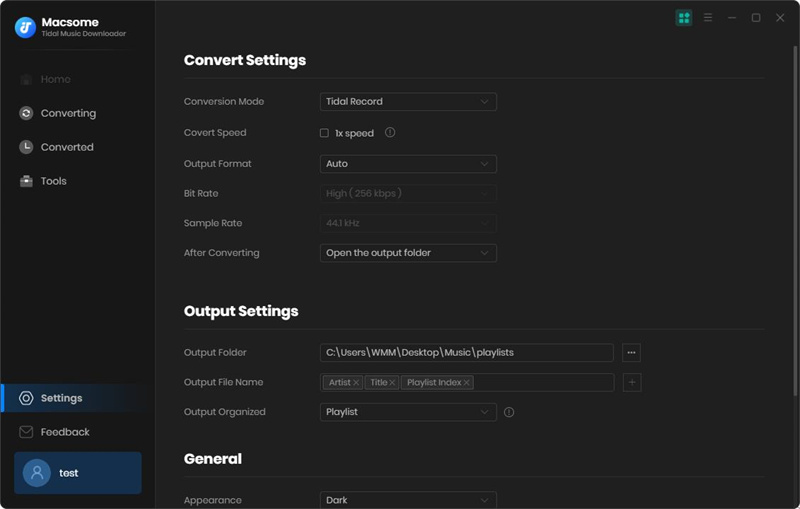
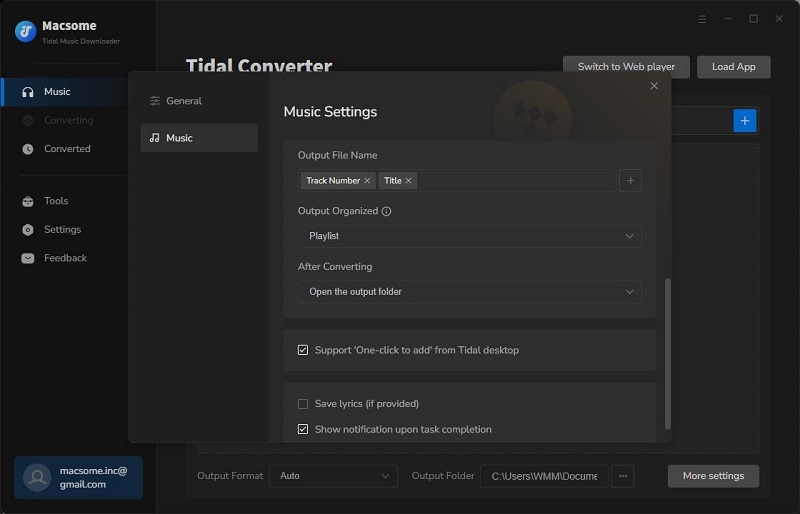
Step 1. Set the Output Formats and Other Parameters
Now you can select the output format, bit rate, sample rate, or conversion mode as you need. Click the "More settings" button, you can set the output folder, output file name, or output organized way.
Save lyrics option: If the song you want to download has lyrics, you can also download lyrics as .lrc or .txt files so that you can keep up with time-synced lyrics of your favorite Tidal songs on any supported media player.
Step 2. Add Tidal Music and Playlists
Tidal App: Tap the Tidal App option, and Tidal app will start at the same time.
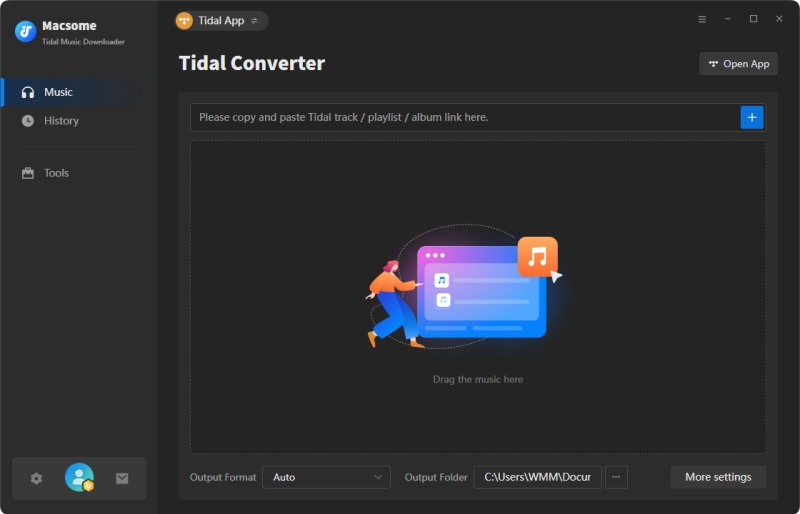
Open a playlist, artist or album on the Tidal app, directly drag and drop the playlist from Tidal to the rectangular box. Plus, you could also copy and paste the link for parsing.
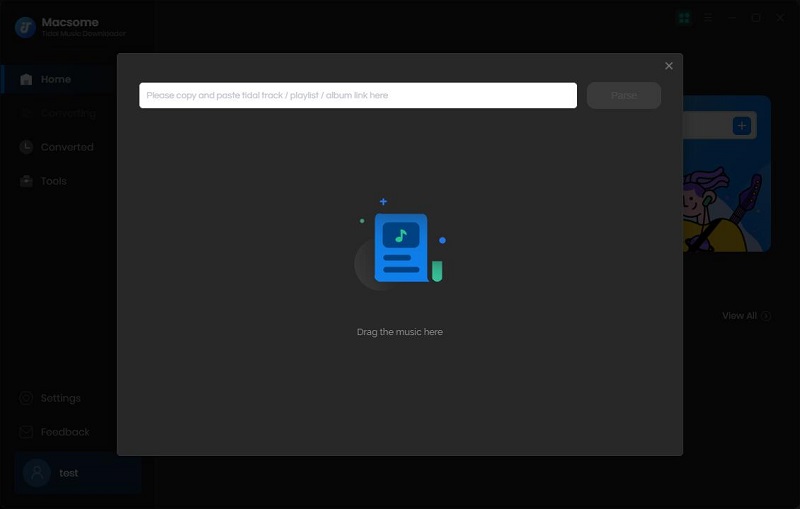
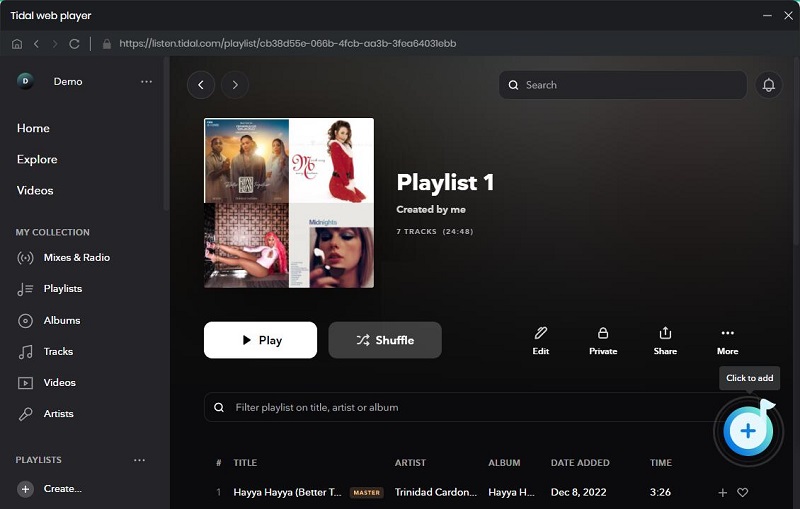
Tidal web player: If you choose the Tidal web player option, and Tidal web player will start at the same time. Use your Tidal account to log in.
Open the Tidal web player, search for a playlist you want to download, and then click the "Click to add" button.
Macsome will parse the link to the playlist you select.
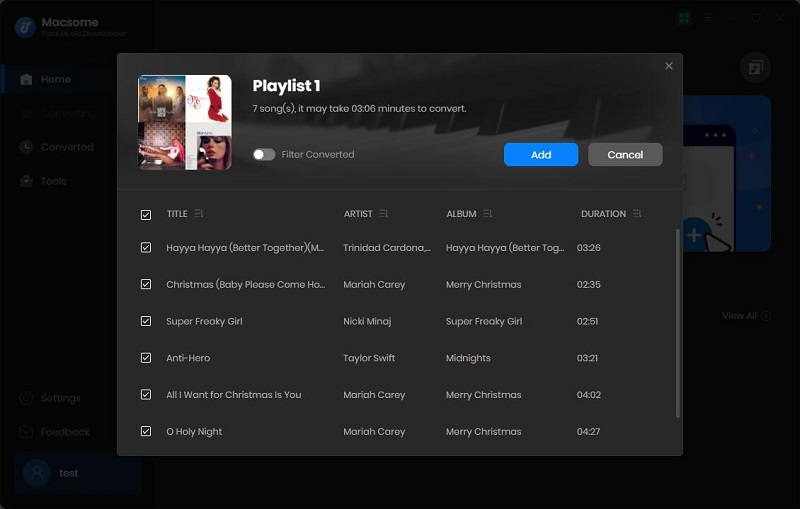
Select the tracks you'd like to download, and click the "Add" button to import these tracks from the Tidal web player into Macsome. To import more tracks, you could click the "Add More" button.
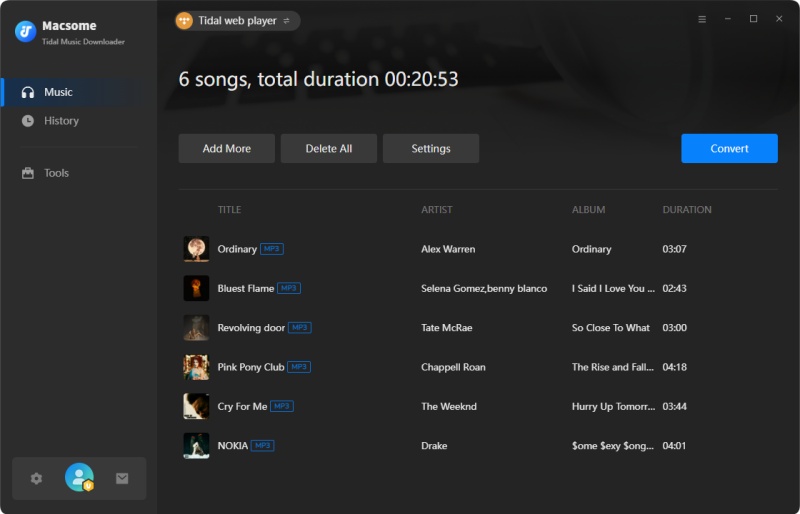
Step 3. Start Tidal Music Conversion
Click the "Convert" button to start converting the Tidal music to the output format you have chosen.
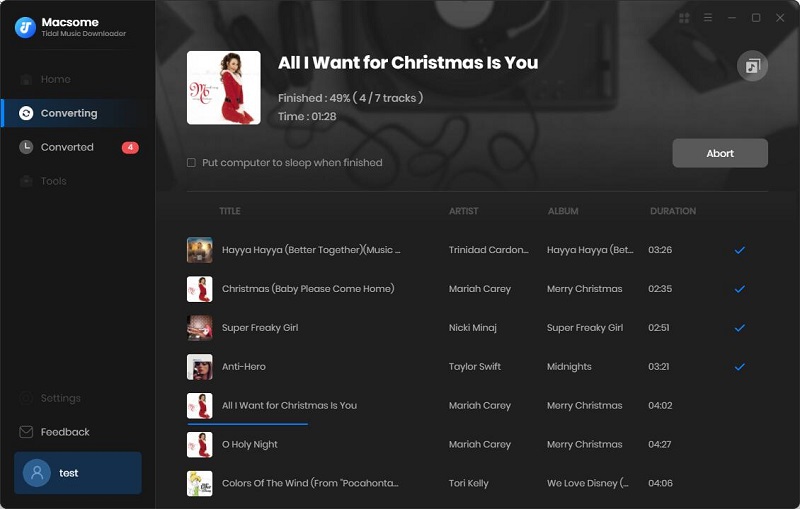
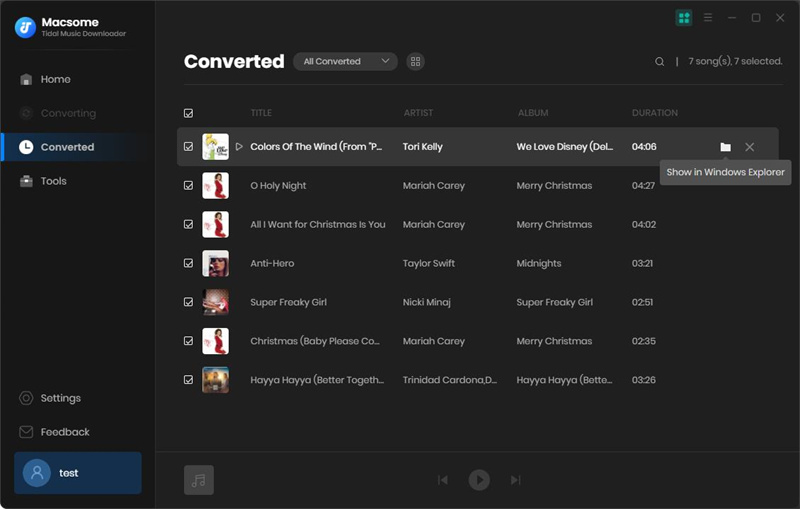
When the conversion is finished, you can check the downloading history from the "History" tab. To locate the converted Tidal songs, you can click the "folder" icon.
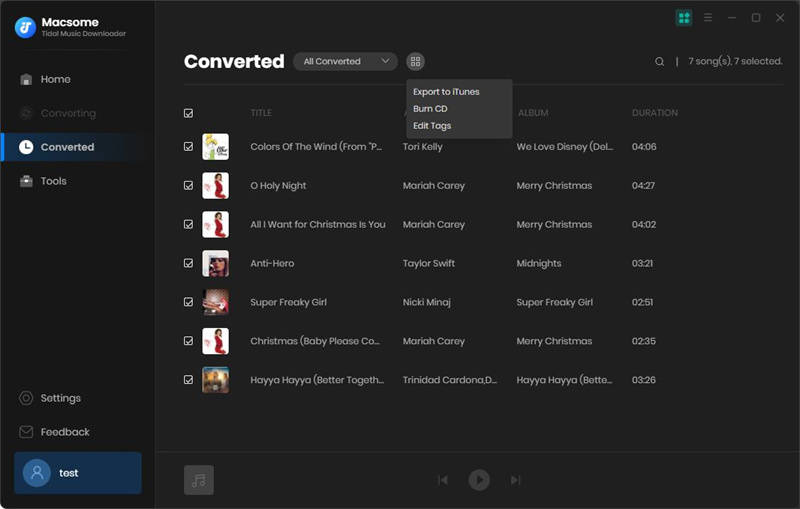
Select the downloaded tracks, you could also export Tidal music to iTunes, edit tags, or burn to CD quickly. Now you can play Tidal music on any device at will.
Part 3: Useful Built-in Tools: AA/AAX Converter, CD Burner, Format Converter, and Tag Editor
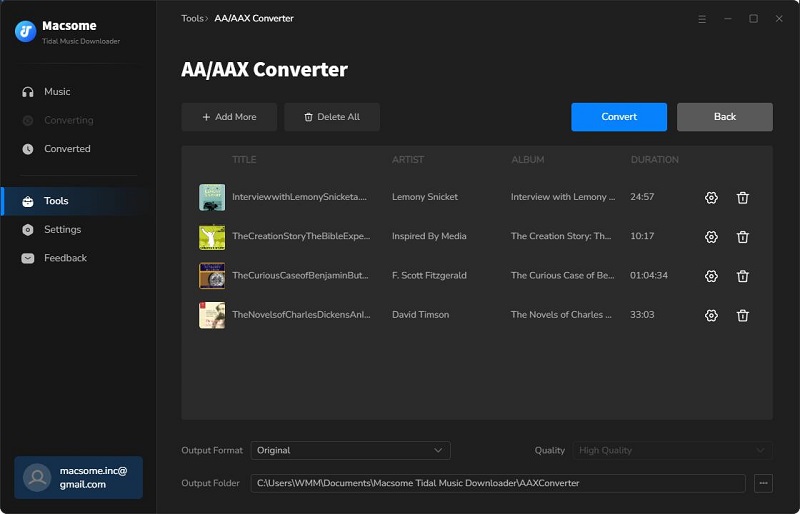
Macsome Tidal Music Downloader can not only download Tidal music, but also supports free tools such as Format Converter, CD Burner, and Tag Editor. It also offers the AA/AAX Converter, which can suppor downloading local Audible audiobooks to MP3, M4A, and M4B without quality loss.
AA/AAX Converter
Click the "Add" button to add local Audible audiobooks to the program, you can also drag and drop the audiobooks to the panel directly.
If you want to organize the output files by chapters or time set, you can click the "Settings" icon to split the audiobook files by chapters, segments, or time set.
You can customize the output settings: Output Format (Original/M4A/M4B/MP3), Output Quality, and Output Path. Then click "Convert" button to start converting the audiobooks to the output format you chosen.
Format Converter
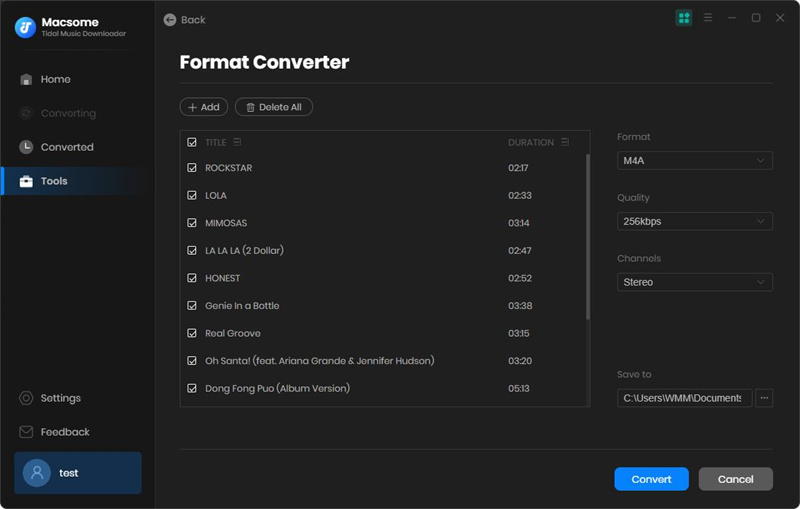
Click the "Tools" tab on the left, then select the "Format Converter", click "+ Add" button to select the music files from your computer to convert them to MP3, M4A, FLAC, WAV, OGG, AIFF, and ALAC.
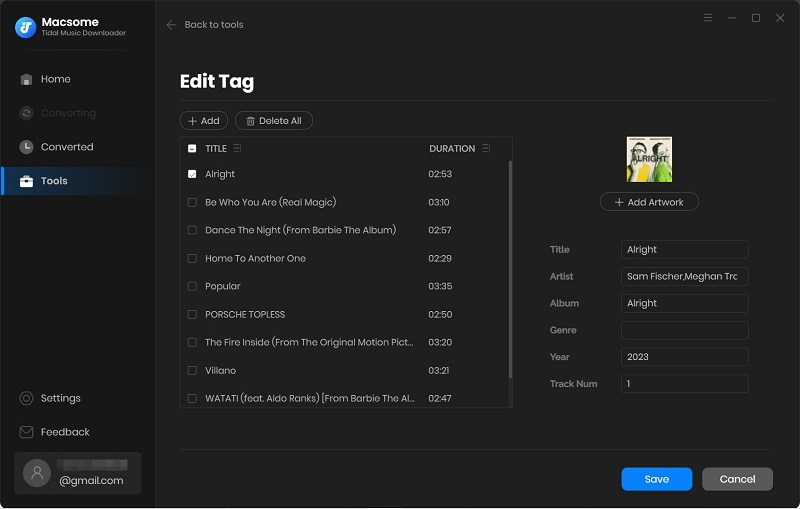
Tag Editor
Click on the "Tools" - "Tag Editor", then select the songs from the local folder by clicking the "+ Add" to edit tags, such as Artwork, Title, Album, etc.
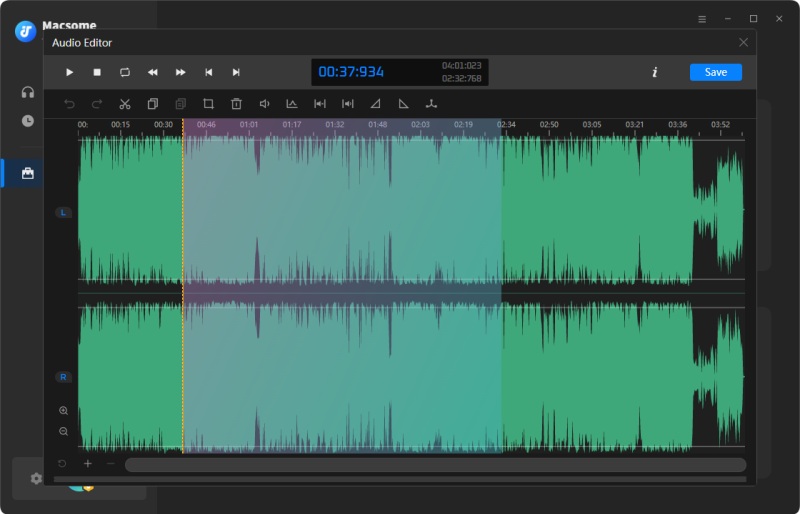
Audio Editor
Click on the "Tools" - "Audio Editor", then select the track you'd like to edit clicking the "Open", you can cut, copy, crop, trim, Fade In, and Fade Out.
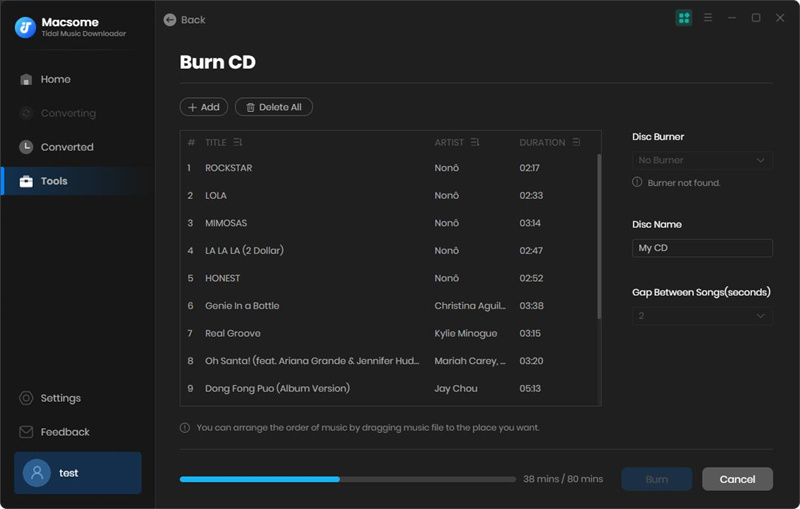
CD Burner
Select the "Burn CD" from the "Tools" pane, click "+ Add" button to select the songs from your local computer, insert a blank CD. Hit on the "Burn" botton to start the burning process. Wait a moment, your songs will be burned to a CD successfully.