How to Backup Apple Music? Everything You Need to Know
Someone thought that they have subscribed to Apple Music service, there is no need to backup Apple Music at all, when they want to listen to music, just open Apple Music and play them.
However sometimes you may encounter no internet, or you want to still keep the downloaded Apple Music files after you abort the Apple Music subscription or some other cases you need the unprotected Apple Music songs.
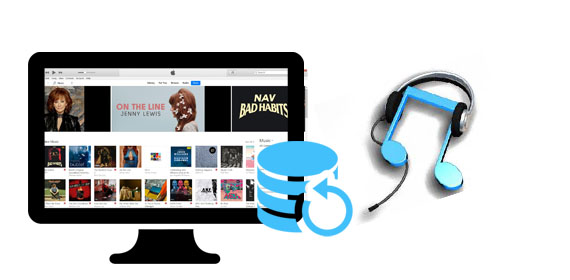
Besides, if users subscribe to Apple Music and enable the iCloud Music library, their physical songs will be deleted and replaced with so-called “known” songs with links to their own versions. When you stop your Apple Music subscription, sometimes you need to find them back, and it is very annoying.
If you'd like to backup Apple Music files, there is no need to worry about the above problems. In the following, we will provide two proven methods to backup iTunes library or Apple Music files to meet users' needs.
Method 1. How to Backup iTunes Music Library
Step 1. Launch iTunes on your PC or Mac, then click iTunes - Preferences - Advance tab to find the iTunes Media folder.
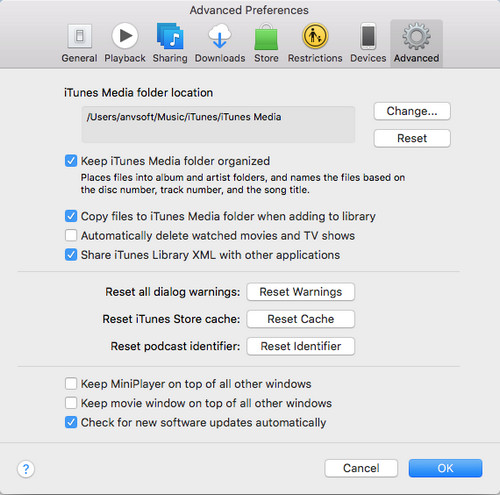
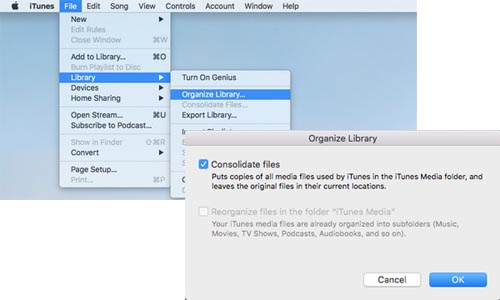
Step 2. Consolidate your iTunes library by clicking iTunes - Library - Organize Library. And then select "Consolidate files" - click "OK".
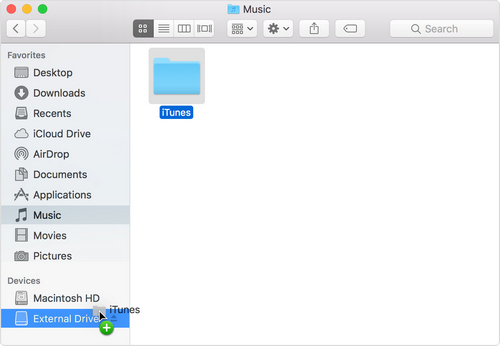
Step 3. Quit iTunes and find the iTunes music folder, then drag the iTunes music folder to your external hard drive.
Method 2. Backup Apple Music Files to Keep Forever
As you know that Apple Music is an online streaming music service. Only during you subscribe an Apple Music service, you can listen to, download or enjoy the music files anytime and anywhere. If you cancel or abort Apple Music subscription, all the music files can't be played anymore including the downloaded ones.
No worries, you can backup Apple Music and keep them longer by using the following tips. Just ask Macsome iTunes Music Converter for help. With it, users can convert Apple Music files, iTunes tracks, and Audiobooks to MP3, WAV, FLAC, AAC, AIFF, or ALAC with excellent output quality and fast conversion speed. Before starting, click the next download button to free download the program.
Step 1. Import Apple Music song to Macsome iTunes Converter.
Double click to install the trial version of Apple Music Converter on your PC, and then run it. Click the "+ Add" button and select the audio files you want to convert from your iTunes library. After you choose the music files you would like to convert, click "OK", and then all the audio tracks files you selected would be listed on the main window.

Step 2. Set the output format.
Click iTunes Converter Menu - Preferences - Advanced or the settings icon to set the output format and output path.
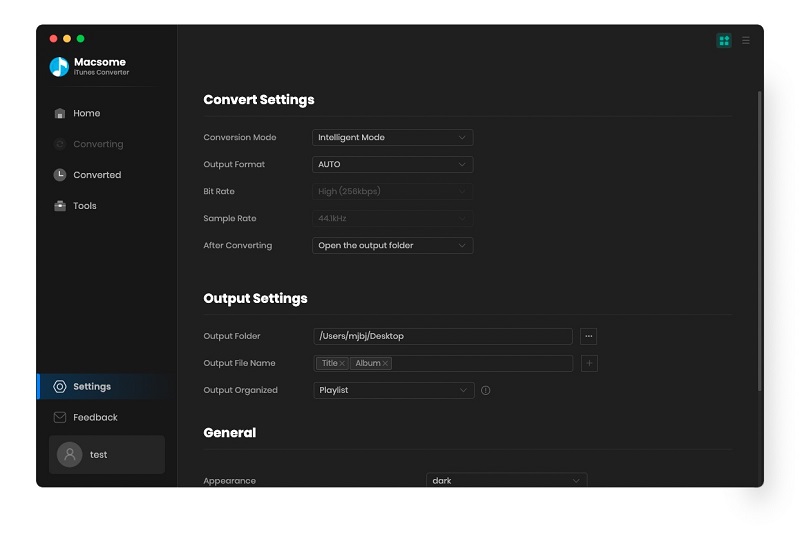
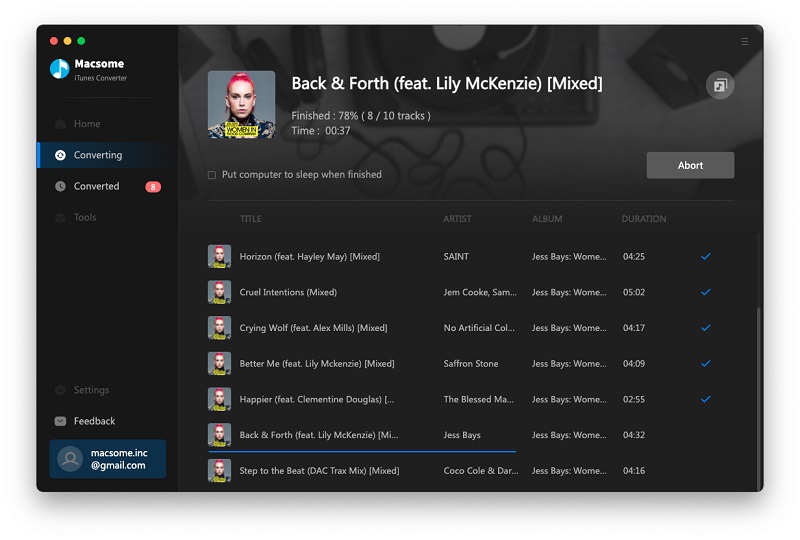
Step 3. Start the Backup Apple Music Process.
Click the "Convert" button to start the Apple Music converting. After the conversion, you can check the history to find the converted Apple Music files saved in your local folder. And then you can back Apple Music songs up on an external hard drive or other backup drives. Now you can still play the converted Apple Music files even if you cancel your Apple Music subscription.
Conclusion
If you've got a huge iTunes music library, you don't want to lose your favorite tunes so it's a great idea to back them up. The above two methods to back up your iTunes library.
Macsome iTunes Converter is a powerful Apple Music Converter recommended for you. With it, you can save Apple Music songs, iTunes and Audible audiobooks on your computer, so that you can move any content from iTunes to an external drive. This program has a free trial, which enables you to convert the first 1 minute of each song. You can buy the full version to convert the full music.


 Belinda Raman